
Tankers!!!
Now, I will show a triple project of 2010 that I really liked. The central theme is the M4A3E8 Sherman HVSS, the famous Easy Eight !!
Now, I will show a triple project of 2010 that I really liked. The central theme is the M4A3E8 Sherman HVSS, the famous Easy Eight !!
 |
| Let's go, Shermie !!! |
 |
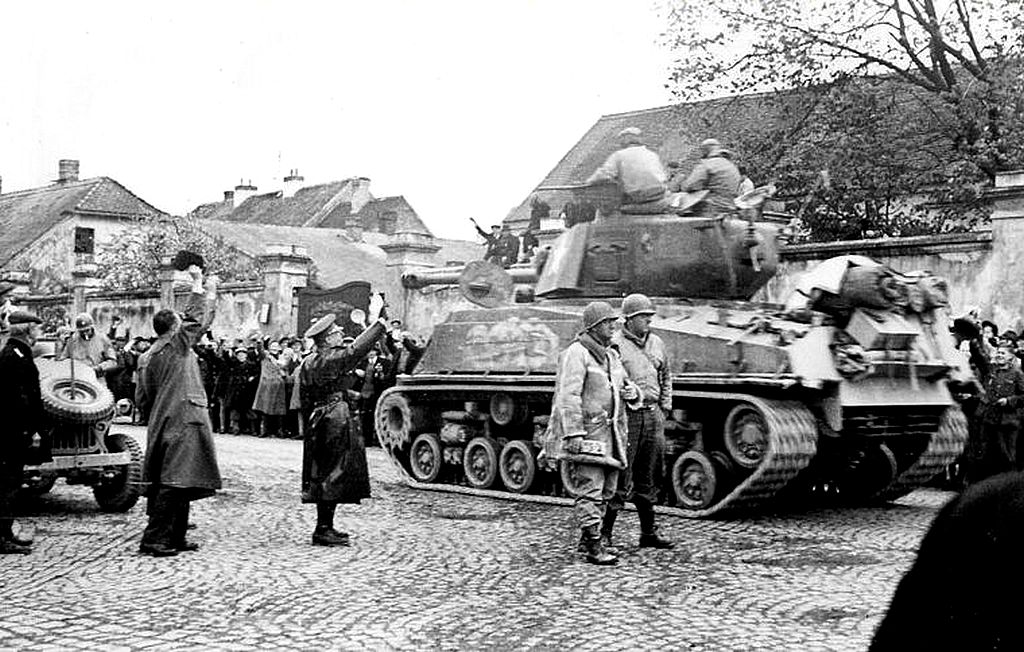
| Medium Tank M4A3E8 (76) W - HVSS in action. Germany, 1945 |
 |
| M4A3E8 (76) W with sand-bags |
One of the advantages of the early Vertical Volute Spring Suspension (VVSS) was that the design did not occupy any space Inside the hull. Also, it was developed and available when production of medium tanks was expanded tremendously.
There were, however, severe disadvantages: A rough ride; excessive ground pressure with the heavier models and the need to jack up the tank Itself in order to change a damaged road wheel - the bogie had to be lifted above the tracks so the wheel could clear the guide teeth.
 |
| Vertical Volute Spring Suspension (VVSS) boogie |
Extended end connectors Improved the ground pressure problem, but they could be damaged by hitting rocks or obstructions - running too close to a raised curb could break off all the extended connectors at one time.
Ordnance had tested many experimental suspension and track designs to replace VVSS and the 16 ½ double-pin tracks. The most successful was a developed form of Horizontal Volute Spring Suspension (HVSS) which featured 4 wheels per bogie with the bogie frame In the center.
Thus, changing a wheel required jacking up only one end of a bogie frame to slide the wheel out over the track. Inboard wheels were removed under the hull.
 |
| Horizontal Volute Spring Suspension (HVSS) bogie |
New wider tracks using center guide teeth were developed and two designs were used on WWII Shermans with HVSS. The first was the T66 single dry pin, 23" wide steel track recognized by its solid one-piece links and scalloped leading edge contour. This was the track used on the earlier HVSS vehicles.

The T80 was a double-pin 23" track with split track shoes, using end connectors as for the old 16 ½ track with separate center guide connectors carrying the guide teeth. It was standardized for postwar use, variations and later developments of which are in use today on modem U.S. tanks.


The new track and HVSS provided a much improved ride and better flotation in soft ground, and most of the Shermans retained for postwar use had HVSS.
 |
| M4A3E8s with different tracks in use in WWII |
The Medium Tank M4A3(76) W HVSS - to use Its official Ordnance designation (M4A3: the model; 76: diameter of the gun; W: wet storage ammo and HVSS: suspension sistem) - had been designated M4A3E8 in the test phase, and it became known as the "Easy Eight" when being distinguished from the VVSS models. Until postwar modifications in other countries, the 'E8 represented the culmination of 3 years of development of the M4 series and was the last of the line of combat tanks called "Sherman".
font: Bruce Culver - in Sherman in Action -Squadron/Signal Publications - DISCUSSION ONLY
Specs:

Specs:

| Medium Tank M4A3E8 (76) W - HVSS | |
|---|---|
| Type | Medium tank |
| Place of origin | United States |
| Service history | |
| In service | 1944–1955 (USA) |
| Used by | United States, and many others |
| Production history | |
| Designed | 1944 |
| Produced | Mar. 1944- Apr. 1945 |
| Number built | 1.172 (all M4A3) |
| Specifications | |
| Weight | 30.890 kg (empty) 33.657 kg (loaded) |
| Length | 7,54 m |
| Width | 3 m |
| Height | 2,97 m |
| Crew | 5 (Commander, gunner, loader, driver, co-driver) |
| Armor | 76 mm maximum |
| Main armament |
76 mm gun M1 (55 rounds)
|
| Secondary armament | .50 cal Browning M2HB machine gun (300 rounds), 2 × .30-06 Browning M1919A4machine guns (4,750 rounds) |
| Engine | Ford GAA V-8, 500 HP |
| Transmission | Synchromesh 4 forward (plus 1 overdrive) and 1 reverse gear |
| Suspension | Horizontal Volute Spring Suspension (HVSS) |
| Operational range | 161 km |
| Speed | 42 Km/h |
I decided to make 03 versions of Easy Eights in parallel:
- The M4A3E8 (76) W "Thunderbolt VII" with additional steel armour in hull and turret, from 37th Tank Battalion, 4th Armored Division, Germany 1945. Col. Creighton Abrams 7th tank named Thunderbolt VII.
 |
| M4A3E8 (76) W - HVSS -Thunderbolt VII - Comander: Col. Creighton Abrams |
- An M4A3E8 (76) W with concrete armor, from 12th Armored Division, Germany, February-January 1945.
 |
| M4A3E8 front glacis with concrete armor - detail |
 |
| M4A3E8 (76) W - HVSS - 12th Armored Division |
- and a M4A3E8 (105) armed with105mm howitzer.
 |
| M4A3E8 105mm - HVSS - 13th Armored Tank - HQ 24th Tank Bn. |
 |
| M4A3E8 105mm HVSS |
 |
| M4A3E8 105mm HVSS with M10 Ammunition Trailer Germany March 1945 |
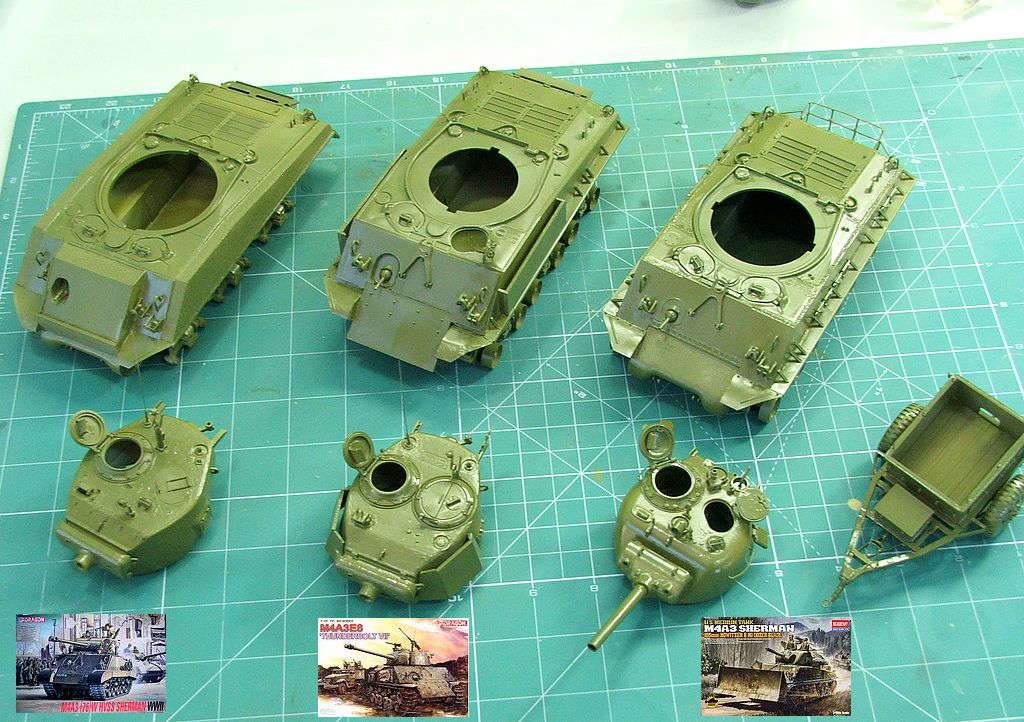
For this triple-project, I used these very, very old kits:
 |
| The Dragon´s - M4A3E8 Sherman Easy Eight (kit 6183) for Thunderbolt |
 |
| The Dragon´s M4A3E8 Sherman Easy Eight (kit 9010) 12th Armoured Division concrete armored tank |
 |
| Model Club conversion kit for Concrete Armor |
 |
| The Academy M4A3E8 Sherman Easy Eight 105 mm (kit 13207). I'll removal the dozer blade,.. I only build kits of WWI and WWII... |
The Building:
Starting by the hulls;
Starting by the hulls;
 |
| The players... |
The conversion kit of Model Club was very simple, but very well done. It consists of 03 pieces that represent "armor" of concrete (two sides and one piece for the front hull). The polyurethane resin parts are excellent. They feature a textured surface and detailed aspect of concrete, no bubbles or warping ...
 |
| Model Club conversion kit in detail... |
I started assembling the three tanks ...Observing in detail the photos, we can see the difference that year (and the criticism ...) made with the Dragon Models. The Dragon´s older model (9010) features several disadvantages when compared to the more modern (6183).
 |
Notice the handles of the front hull is more to the sides
in the 9010 kit than in the other two ...
|
The more modern hulls (Dragon 6183 and Academy) have the option of the engine grills as a separate piece, if the modeler wants to detail the inside.
 |
| The grills of Ford engine are in separate |
The Oldest Dragon hull comes with the engine cover "fixed", as well as horrible notches in the positioning of tools:

Dragon 6183 and Academy´s hulls, more modern, have foundries marks with good weld seams ...
 |
| Casting marks in the hull... |
The old Dragon (9010) shows the absence of this important detail:
 |
| The weight of age...To correct this, Archer Decals !!! |
I decided to start the building by the older hull ...Archaeological moment: Did you know that the Dragon used the Italeri´s (M4A1 VVSS) molds to make the lower hull of 9010 kit ???
Amazing !!!
To adapt the bogies HVSS in a hull VVSS, some surgical steps are needed, "candidly" explained in the instructions booklet. Look and cry:
 |
| Old Dragon lower hull: Same M4A1 VVSS Italeri. Surgery in the red arrows. Notice the bolted hatch in the rear: radial engine |
 |
| New Dragon lower hull: Corrected bogies positions and hatch for Ford engine |
But back to the Surgical Center... Cutting the support of the bogies, with Dremel and abrasive tool:
 |
| Surgery in progress... |
 |
| Ready for HVSS bogies |
Here, the model age shown blatantly: A piece that was originally cast in earth molds (and therefore with a roughness surface ...) is presented in old kit smooth as "an angel butt"...
 |
| Smooth and wrong... |
 |
| Corrugated and ok... |
 |
| side by side... |
But back to the hull Dragon 9010; Holders of the bogies attached...Hull signed with the positioning of the return rollers: another pearl from ancient kit.
 |
| Lower hull under construction |
Measures such as 10.5 mm and 13.4 mm making the strongest cry ...
 |
| Transform this old kit into something decent it's a tough job !!! |
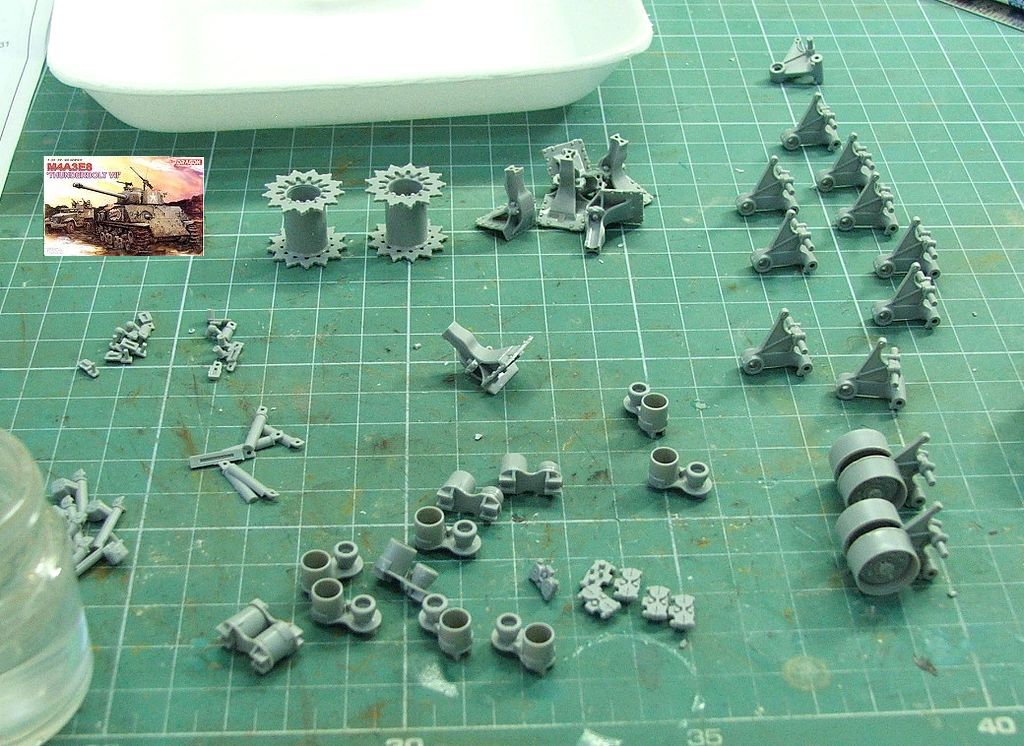
Always a too boring step: the cleaning of suspension components:
 |
| wheels. wheels, wheels... |
But enough whining ...To the return rollers become perfectly aligned, follow the steps of the booklet. I used a "ruler" of wood to align the tops of the rollers. They have different diameters: Instructions of the booklet are correct ...
 |
| by the book... |
And the beginning of the 9010 bogies assembly. The alignment is essential here:

While the "legs" of old 9010 was dry and firm, I started cleaning the suspension components of the Dragon hull 6183.
Infernal Gods, why there are so many little pieces??
The Dragon is weird: Or do an awful adaptation, like the ugly 9010 hull or make a crazy amount of parts in the new kits (many would simply be injected into sub-sets ..) on behalf of "detailing in a state of art ... " This also led to many complaints and it seems that the Dragon has found a balance in the Smart-Kits. My two cents !!!
Be careful when building the arms of the bogies:The instruction booklet contains an error in the insertion of parts Q13 and Q14.
They point to the hole bottom (and largest) of the bogie arm ... and the drawing below show parts Q13 and Q14 installed properly ... see the info-graphic:
 |
| Notice the booklet error... |
The bogie´s arms built:


The "rubber bands" on the bogie wheels are separate. My initial idea was to paint and mount separately, which would greatly facilitate my task. But the rubber bands of the internal wheels did not "enter" after the bogies assembled (I glued the bogies.)
So, I mounted the rubber bands in the inside wheels (red arrows) and let the outside for once painted (blue arrows):

And, finally, the Dragon 6183 kit suspension built and aligned:
 |
| Pheeww!!! Done !!! |
I removed the oval covers on the back of Dragon oval and filled the cavities of links supporters, with putty:

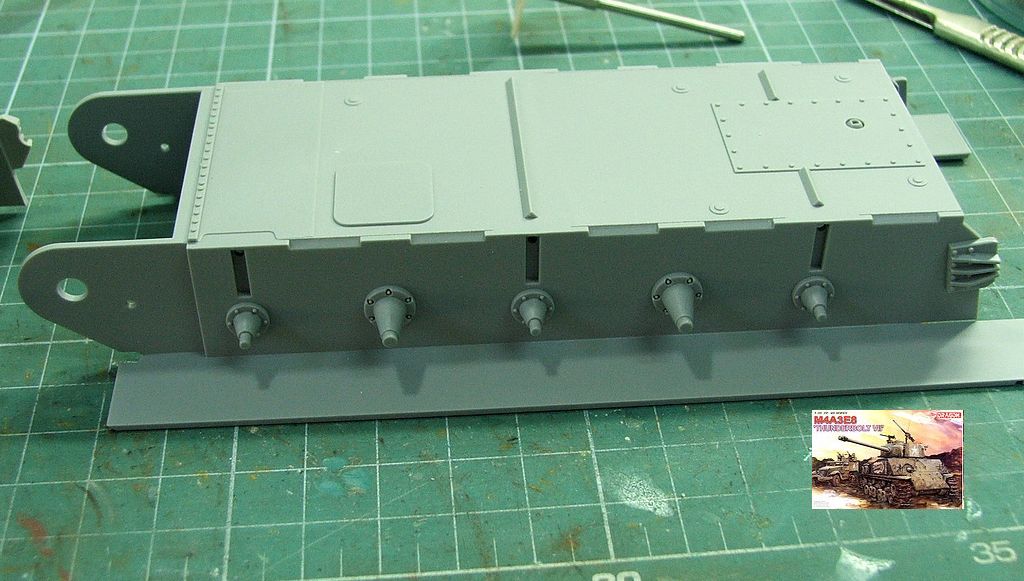
While the putty dry, I devote my attention to the Academy's Easy Eight. The plastic used (dark green) is much softer than the other two. As always, I started the building by the suspension, which is much easier to build than the Dragons:
 |
| Academy parts of suspensions |
Then, I discovered a little tragedy: I was randomly selected by the loss of a small return roller. One of E6 six pieces was missing!
 |
| Lost !!! My precious, lost !!!! |
Thankfully I have a jelly called Reversible Hydrocolloid used in laboratories of dental prosthetics. (See article here...in portuguese...).
I glued a piece of E6 as "master" at the bottom of a form of plastic, with a minimal amount of glue. Hydrocolloid was melted in the microwave (30 sec.). After that, pouring the jelly on the plastic form:
I glued a piece of E6 as "master" at the bottom of a form of plastic, with a minimal amount of glue. Hydrocolloid was melted in the microwave (30 sec.). After that, pouring the jelly on the plastic form:
 |
| The hiydrocoloid melted |
 |
| The substance: Reversible hydrocoloid K-27 |
 |
| With the normalization of the temperature of the jelly, it begins to harden |
When harden, the jelly allows the removal of master ... Notice that there are two small bubbles (red arrows), but they are external, will not cause problems ...
 |
| the impression in the hydrocoloid (left) and the master (right) |
 |
| Using dental acrylic to reproduce the wheel... |
 |
| Acrylic mixed and poured into mold... |
After few minutes, the reproduction is ready...
 |
| A new wheel was born !!! |
Now, you can cut the hydrocolloid (mold) in parts and return the parts to the pot, to be reused the jelly in the future.
 |
| The Academy's lower hull - left side |
 |
| The Academy's lower hull - right side with new wheel in position |
 |
| The three Shermies, side by side... |
Continuing the building of the Academy kit. First, I decided to improve the welding of the hull which are in low relief. In the original, are higher ... I used stretched sprue to make volume:

...and then I used an electronic welder (40 W) in the stretched sprue. Added too the details of the hull and glacis ...
 |
| Academy's hull with details... |
Based on this picture of a 105mm HVSS of WWII, decided to do something similar in the rear of the tank.
 |
| Notice the rack in the rear of Easy Eight |
Making the rear rack, made in the field: Copper wire and welder

A small addition: the metal parts from RB Models ... beautiful thing!!

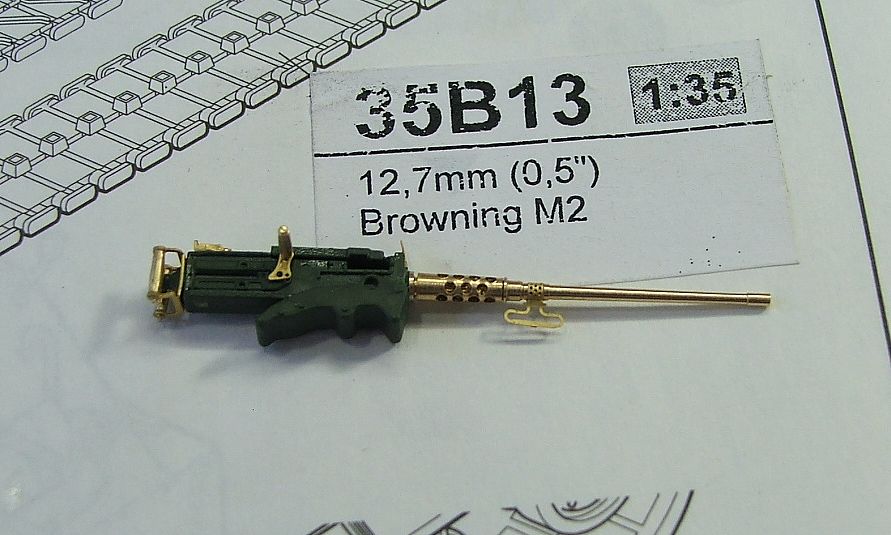 |
| Fifty caliber !!! |


 |
| Almost there... |
 |
| M4A3E8 105 HVSS dragging an ammo trailer |
And I found this little beauty in my closet:

A pretty small resin kit, with easy instructions to built:
 |
| instructions |
 |
| resin parts |
But as it was a very old kit, the resin floor appears to have contracted and the floor was small ... Just do another in plasticard:
 |
| scratch in plastic... |


But Tony Denazo, in Armorama, warned me that the Verlinden kit was not from WWII era. It was the M332 trailer. What I needed was the M10 trailer: Thanks, Tony !!!!
 |
| M10 ammo trailer |
The Tiger Model Designs manufactured a beautiful kit of M10 ammo trailer, but very hard to find, now ....
Surgery time !!!!
After use the Dremel with a certain "resourcefulness," this is the final result ....
 |
| Transforming a M332 trailer in to M10...Sorry, purists, but... |

I think that the my M332 was very similar to the real M10 ...

 |
| The semi-scratch Panzerserra's M10 ammo trailer. Uff... |
Well .. For my heartbeat back to the normal after the scare with the trailer, I started the use the resin kit from Model Club and build the hull of Easy8 with concrete armor.
 |
| The "host" is the oldest Dragon kit (9010). |
As the concrete armor covers the entire front-glacis, I not used the bolted part between the transmission cover and front glacis (my spare parts box says: Thanks a lot! ...)

Using cyanoacrilate (superglue):


I like it !!!! The texture of the concrete is amazing !!!! But, the .30 Browning was not cool...
 |
| .30 Browning by RB Models |
 |
| Concrete and 105mm side by side |
 |
| Upper-hull in the new Dragon |
 |
| Three amigos !!! |
Time to add the last details, before painting. The newest Dragon (6183) comes with metal fenders: lets fold and weld ...

...And using cyanoacrylate in the fenders:

Thunderbolt looked like this:


 |
| Thunderbolt 6183 is ready for paint ... |
Time to improve the old Dragon (9010). The turret and transmission cover do not exhibit casting texture. This defect is clear when compared with younger Dragon (6183)!
But this is easily solved: Just dilute a good amount of putty with acetone and apply with a broad and hard brush in the areas we want to characterize. The result is this (note that some details were added to the turret by scratch and other minor components of the other Dragon):


The same treatment with putty on the Academy´s girl. Although the Academy present texturing on transmission cover, the turret is less clear ... we will improve it:


While the putty and the glue dries, we will further refine the ammo trailer M10. Copper wire for the missing handles and chains:


 |
| The Girls ready for paint... |
 |
| Primer !! |


Color base: Olive Drab !!!

Now, time of the last detail: Oldest´s Dragon (9010), besides the absence of texture casting (note in this photo the good characterization with putty...).. does not have the casting numbers.
Archer makes a wonderful decal to make these details. I have my tip for this: I apply the Archer´s decal AFTER the first layer of base-color.
With this, I think the decal details become clearer and sharp. After that I just apply a thin layer of base color, just to cover the decals and done!

Notice in this photo the EXCELLENT concrete texture of the conversion kit from Model Club:

Ups e downs in color-base...plus a layer of Future, for the decals...

The best part: decals !!!
 |
| Girls with make-up !!! |
 |
| The ammo trailer too !!! |
Painting the wheeels ...a boring step, but necessary !!, Soon, the weathering!!!

 |
| Thunderbolt VII (new Dragon) under weathering... |
 |
| The older Dragon, with the Model Club conversion kit. Weathering start ... I made clear markings of rust on the "marriage" between concrete and armor ... |
 |
| The Academy 105 HVSS... |
 |
| ...and M10 trailer. |
After tracks, mud, dirty, chipping and... M4A3E8 with concrete armor:


Thunderbolt:


Academy 105 HVSS:


And the Three Musketeers (there were four ...)

I resumed the job by the ammo trailer: I will cover the load in the trailer with a tarp. But the trailer has a hole in the back and I need to show some of the load through this opening...
Easy!
I put a popsicle stick to simulate the presence of a wooden box. I glued the wood on the inside back cover of the opening of the trailer: See the pics below:
 |
| popsicle stick as wood crate |
 |
| The wood through aperture... |


After tracing-paper dried, I painted the canvas with acrylics...
 |
| Notice the "wood crate" visible through rear hole !!! |
 |
| The canvas drying... |
I used the same technique to simulate cargo in the rear deck of the Concrete tank:
 |
| Carving the Styrofoam to simulate cargo |
 |
| other view... |

After applying the tracing-paper + glue, a coat of paint and some color effects: In the Easy eight with concrete armor:

In the Thunderbolt:

And in the M10 ammo trailer;

For the M4A3E8 105 HVSS, I opted for another approach, in the item cargo: I used roll- beds, crates , etc... in resin, in the rear deck of the tank.
 |
| Resin stuff |
 |
| Jerry-cans and water-can for the rear rack |
After all painted and glued, a piece of tarp over the load:
 |
| Cargo stuff in the 105 HVSS tank |
M4A3E8 (76) W - HVSS from 12th Armored Division, Germany, February-January 1945.
 |
| M4A3E8 (76) W - HVSS - 12th Armored Division - Germany, 1945 |


 |
| M4A3E8 (76) W - HVSS - 12th Armored Division. |
M4A3E8 (76) W - HVSS - Col. Creighton Abrams "Thunderbolt VII" - 37th Tank Battalion, 4th Armored Division, Germany 1945.
 |
| M4A3E8 (76) W - HVSS - "Thunderbolt VII" - 37th Tank Battalion 4th Armored Division |


 |
| M4A3E8 (76) W - HVSS - "Thunderbolt VII" - 37th Tank Battalion 4th Armored Division |
...and the M4A3E8 105mm with M10 ammo trailer, unit unknow, Germany, 1945.
 |
| M4A3E8 105mm - unit unknow, Germany, 1945 |


 |
| M4A3E8 105mm with M10 ammo trailer - unit unknow, Germany, 1945 |
 |
| M10 ammo trailer - close-up |


 |
| M4A3E8 105mm with M10 ammo trailer - unit unknow, Germany, 1945 |
Well... The job is done !
Thanks for following the topic!!!!
See you, soon !!!
stunning job as the one on the famos, and stunning girl ....
ResponderExcluirhubert
Thanks, Hubert !!!
ResponderExcluirAll the best !!